Creating Data Sheets from files
Data Sheets can be created from common file types used to record experimental data. The supported file formats are:
- Microsoft Excel 2007-365 (.xlsx)
- OpenDocument Spreadsheet (.ods)
- Delimiter-separated values (.csv, .tsv, ...)
For best results, ensure that there is a single table per sheet in the workbooks you use to create Data Sheets, and that the records are horizontal.
✔️ This is supported:
| A | B | |
|---|---|---|
| 1 | Compound | Result |
| 2 | CMPD-001 | 42 |
| 3 | CMPD-002 | 84 |
❌ This is not supported:
| A | B | C | |
|---|---|---|---|
| 1 | Compound | CMPD-001 | CMPD-002 |
| 2 | Result | 42 | 84 |
How it works
The process of is composed of three steps:
- Selecting the files to analyse
- Configuring the sheets found across the selected files
- Delimiter-separated values files will result in one sheet per file
- Verifying the Data Sheets and Columns generated by the system, and resolving potential issues
To initiate the process, navigate to the Assay Model to add Data Sheets to under the Assay Administration section, or create a new Assay Model.
Under the Data Sheets tab, click the Import button in the toolbar.
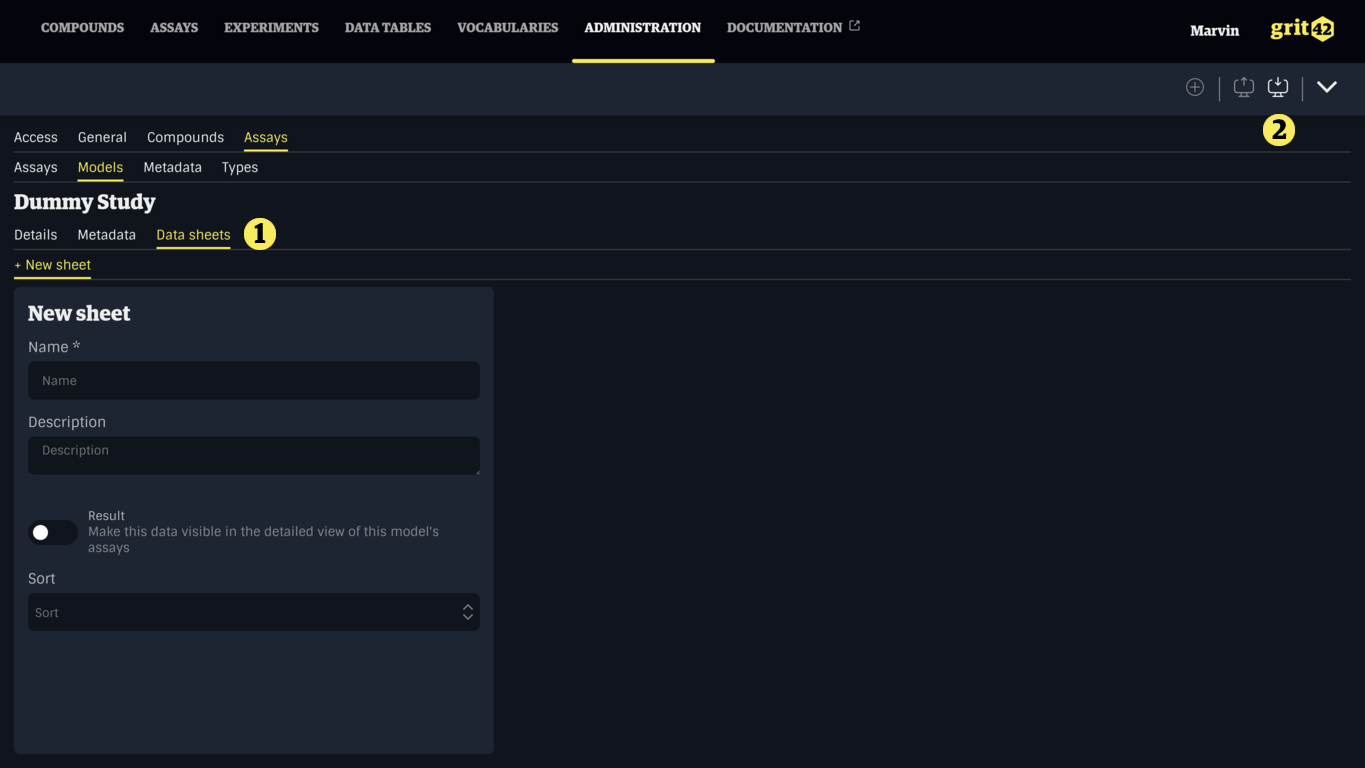
In the form, select one or more files by clicking or dropping files in the drop-zone (1).
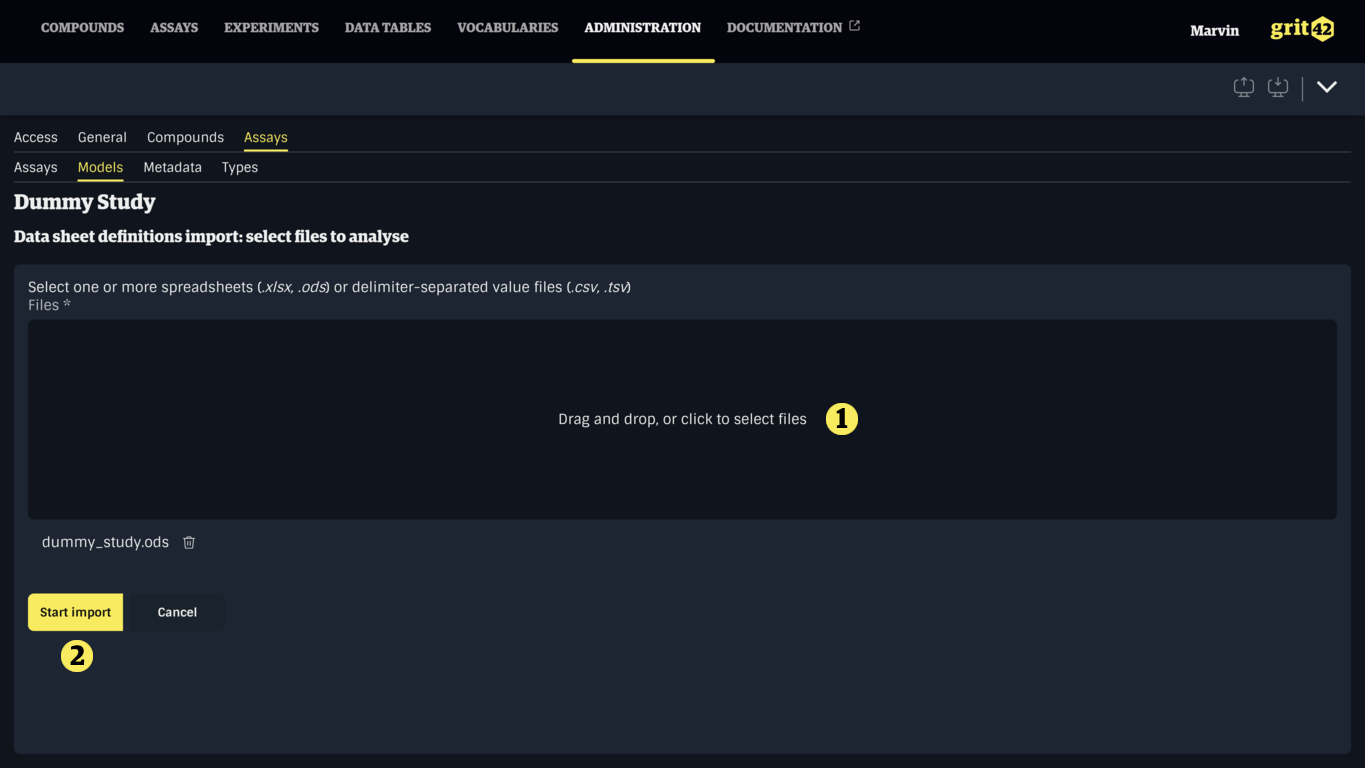
Once satisfied with your selection, click the Start import button to import the files and go to the next step.
Previewing and configuring the sheets
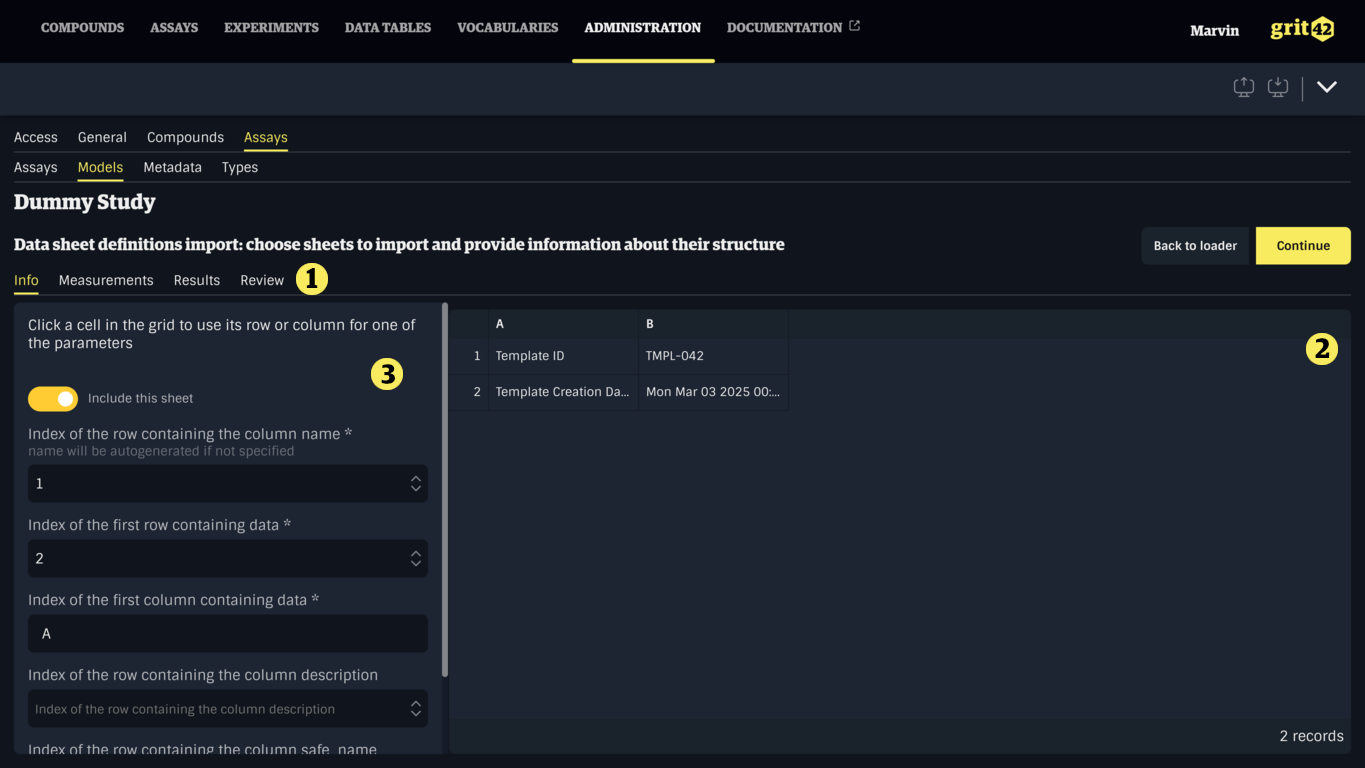
This step provides a preview of the sheets that were found in the imported files, each represented by a tab (1). Each tab displays a grid showing all the columns and the first 100 rows of the sheet (2), and the form for configuring the analysis of the sheet (3).
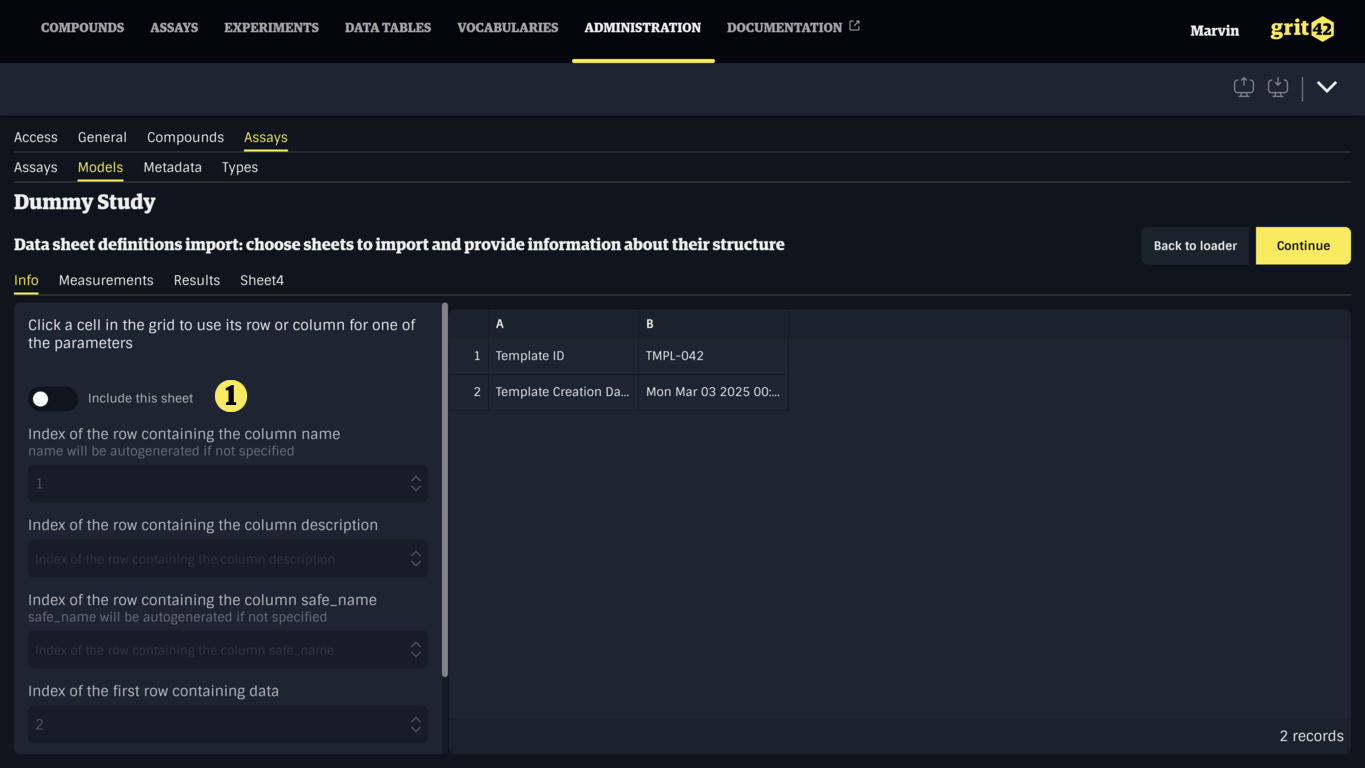
If a sheet is not of interest and the corresponding Data Sheet should not be created, it can be ignored by toggling Include this sheet (1) off.
If a sheet is of interest, some information must be provided by filling the form (1), or by clicking a cell in the table and choosing the appropriate option in the dropdown (2).
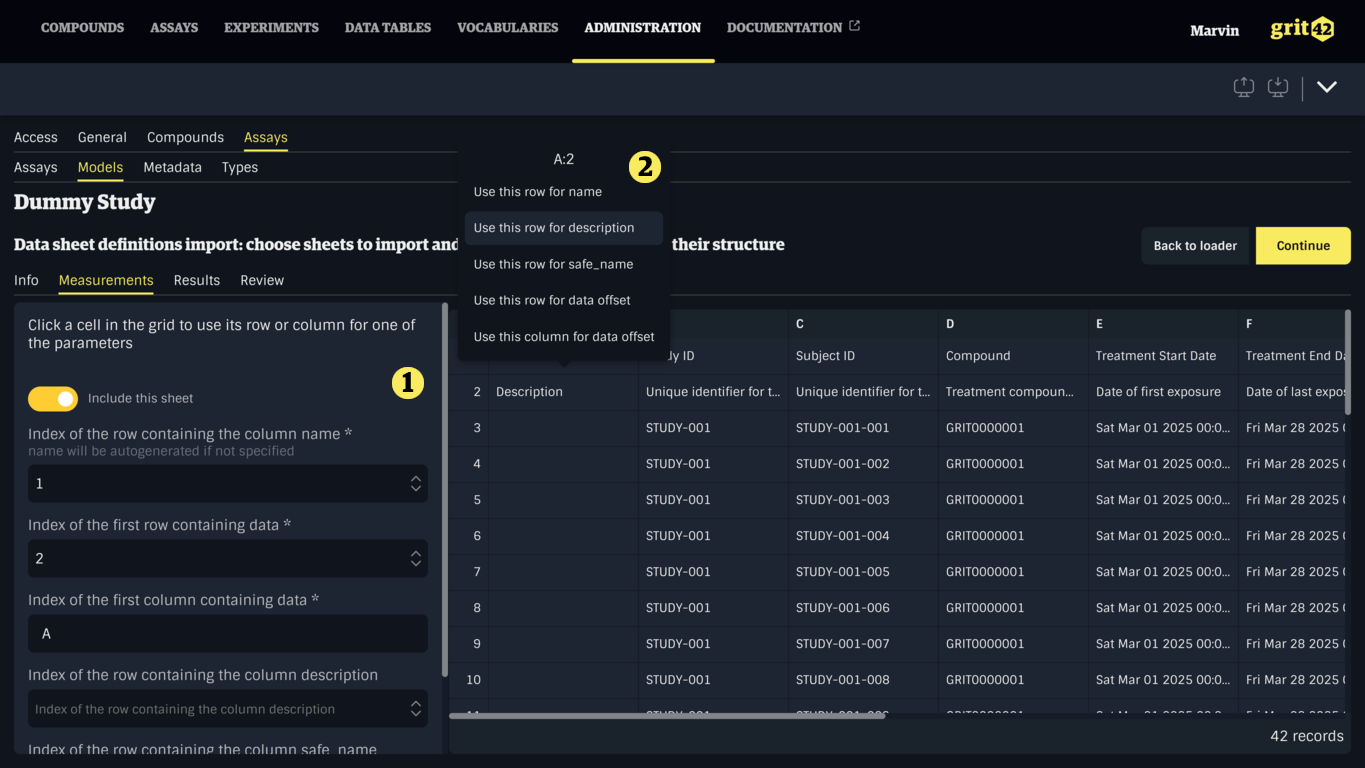
The following information is required:
- The index of the row containing the name of the columns, required to name the column
- If a cell on this row is empty, the value will default to cellX, with X being the 0-based index of the column
- Defaults to
1
- The index of the first row containing data
- Defaults to
2
- Defaults to
- The index of the first column containing data
- Defaults to
A
- Defaults to
The following information is optional:
- The index of the row containing a description for the columns
- Empty cells will be left empty
- The index of the row containing a safe name for the columns
- If set, the value will be transformed to match the constraints of safe names
- If not set, the value in the name row will be transformed to match the constraints of safe names
Once the relevant sheets have been configured and others have been excluded, click Continue (3) to generate the Data Sheets and go to the next step.
Verifying and correcting the generated Data Sheets
This step provides an overview of the Data Sheets that were generated from the previous step, each represented by a tab (1). Each tab displays the details of the Data Sheet (2), and its columns (3). On the left side is a summary of issues (4) that need to be resolved before the Data Sheets can be saved. If the columns don't look right, go back to the previous step by clicking Back to mapping (5) and check the configurations.
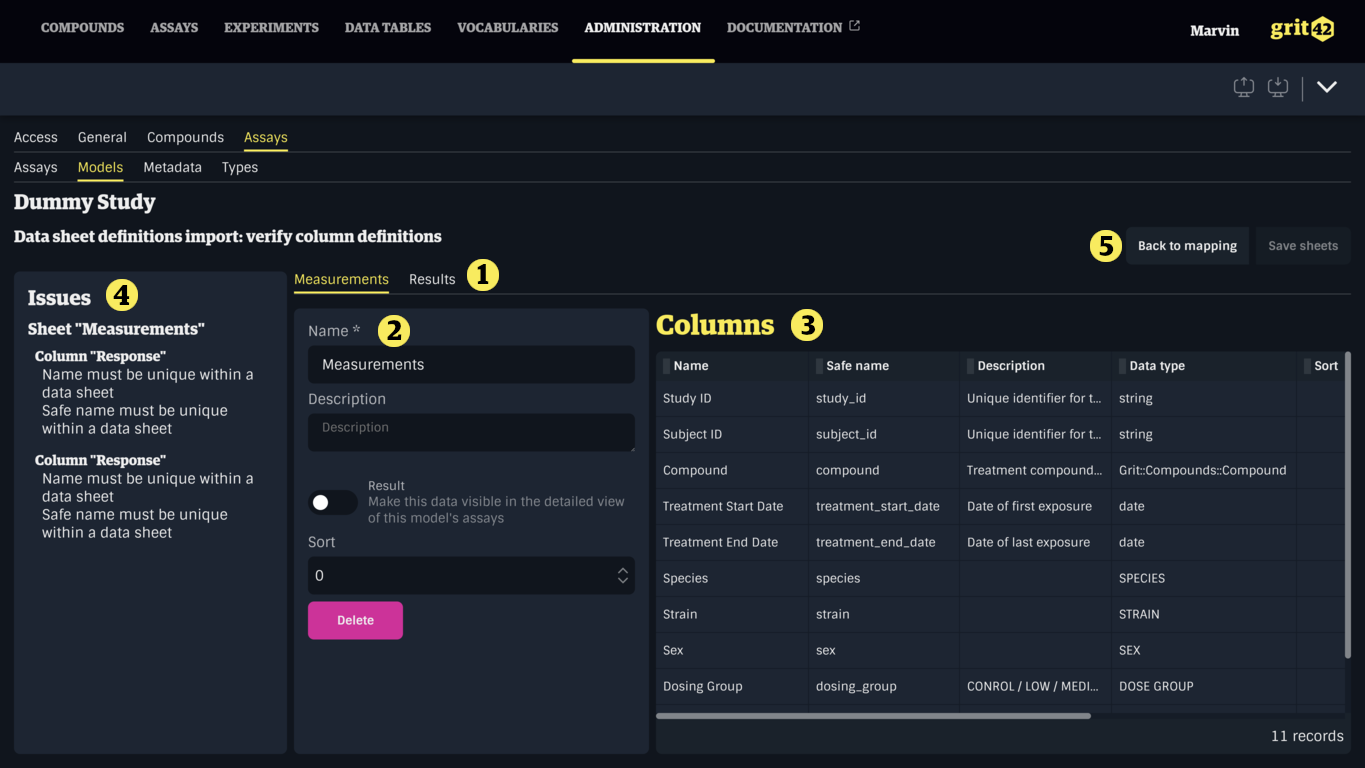
Columns can be modified by clicking a row in the Columns table (3).
Data Sheets and Columns with issues can be brought forward by clicking their name in the issues summary (4).
Errors are also shown below the relevant inputs.

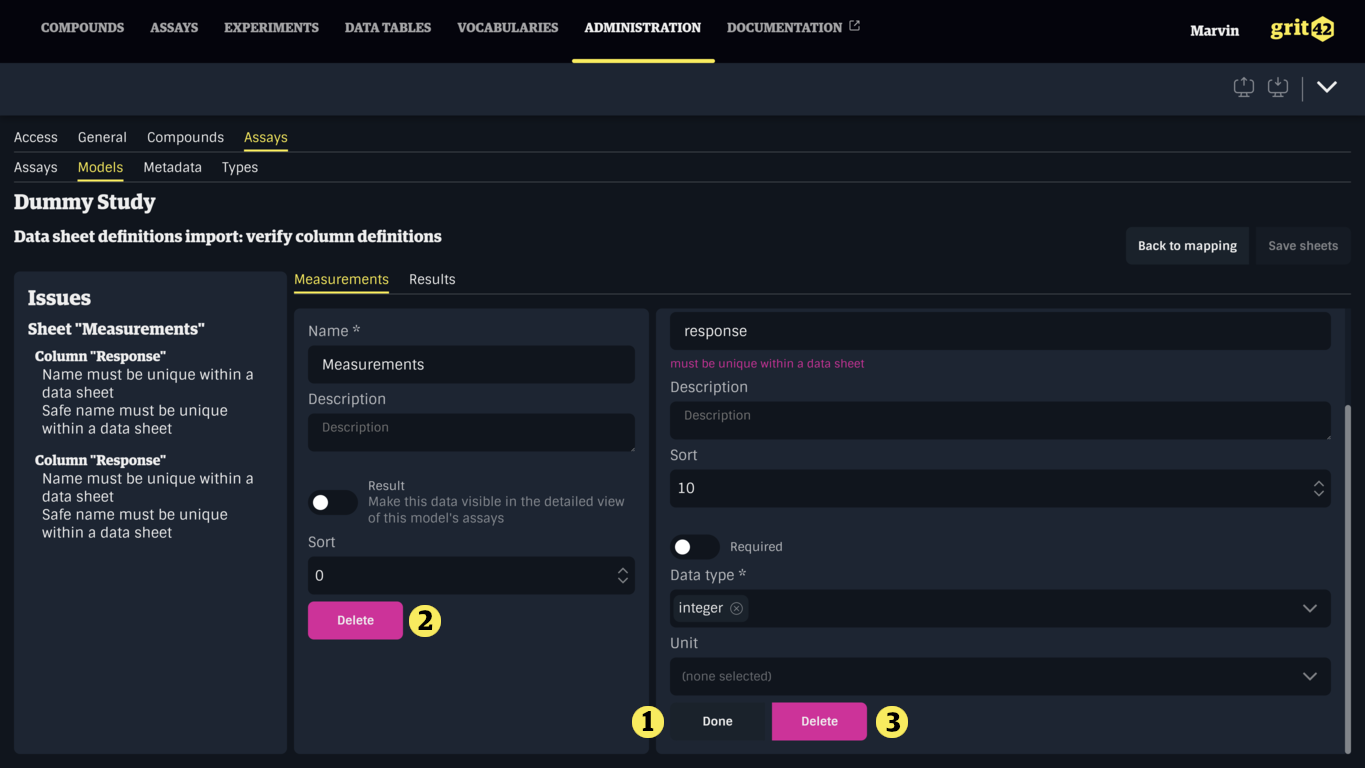
The detailed view of a column can be closed by clicking the Done button (1). Sheets and columns can also be deleted by clicking the appropriate Delete button (2), (3).
Deleted sheets and columns can only be recovered by going back to the previous step then forward again, erasing all modifications. If a sheet was deleted by mistake, it can be imported again by itself. If a column was deleted by mistake, it can be added again after saving.
Here, the generated Data Sheets and their Columns should be reviewed. Pay attention to the names, safe names, and data types of each column and correct them if necessary. It is also possible to mark columns as required, and set units if relevant.
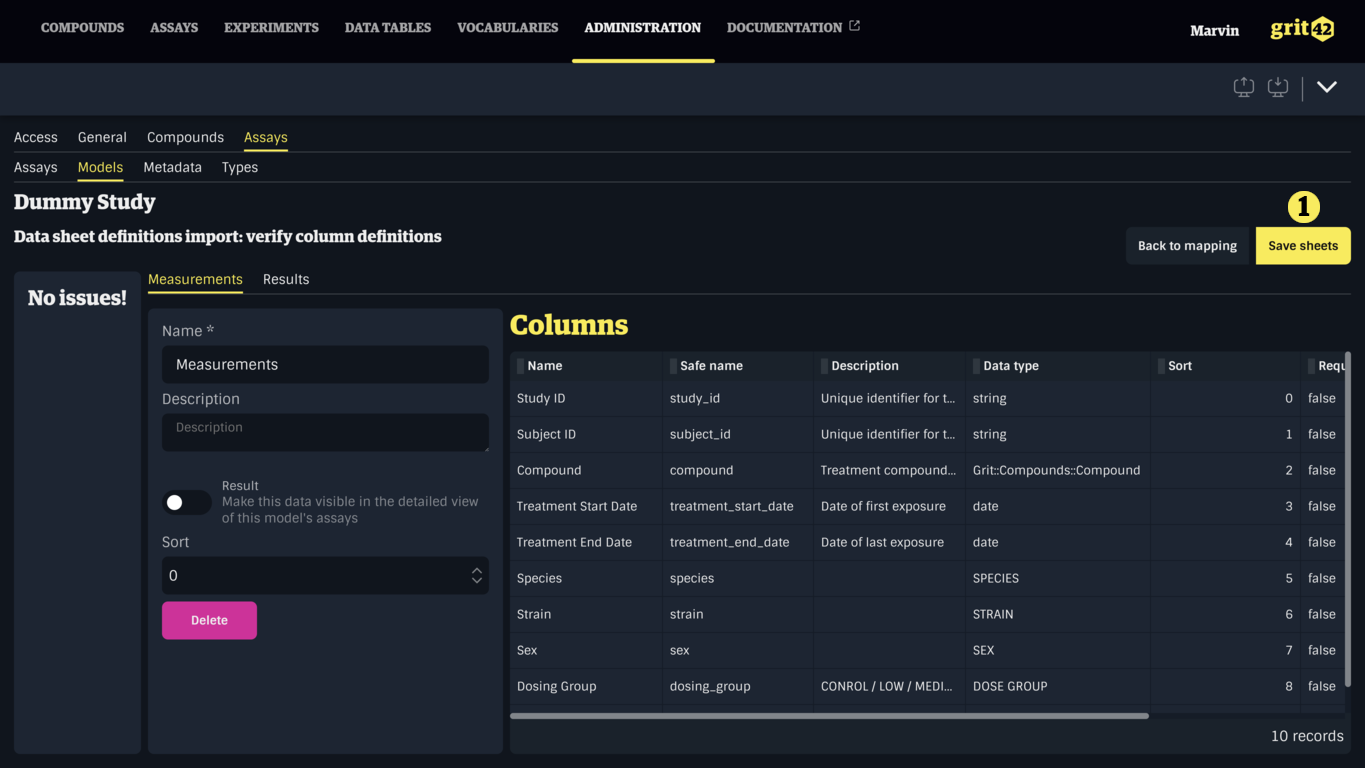
Once the issues have been resolved and the Data Sheets have been reviewed, click the Save sheets button (1) to save and go back to the Assay Model.
A note on data types
For convenience, the system attempts to guess the data type of columns based on a sample of their contents, up to the first 100 rows after the provided offset.
Guessed data types include scalar types (string, text, integer, decimal, date, datetime and boolean), and use the most restrictive option (e.g. if all value in the sample are integers, resulting data type will be integer, even when other records outside the sample are decimals and the correct type is decimal).
If a column is identified as string, it is checked against entity data types (Vocabularies, Compounds, Batches... if present). This mechanism is not 100% success rate and should always be double-checked. Entity data types will only be guessed correctly if the contents of the cell is already in the system, (Vocabulary Item, or Compound or Batch).
Further editing
After the Data Sheets have been imported, the Assay Model can be further edited by modifying, adding and removing sheets and columns, as well as import new Data Sheets using the same process.